Showing posts with label Halloween Party. Show all posts

Thursday, October 15, 2015

Haunted Mansion Inspired Room


This blog post features the details I put into making my Haunted Mansion inspired room. In this case it happens to be my kitchen since that is where most people hang out when you throw a Halloween party. The pictures below are broken down into sections and I'll share some tips with you. Throughout I'll reference the links to some print outs I found that helped me create the room.


The above picture showcases how easy it is to use things around you to keep costs low. The branches I took from my back yard were already dried out and dying. The roses you see in bottom right picture I already had dried out a while ago. All the frames you see in the picture were on that cut out ledge already I just swapped out the pictures with things I printed out from Pinterest. I chose the original Disneyland entrance sign, the ghost at the organ, and a Madam Leota in the seance scene. I like how the pictures almost look like they are glowing.


Moving on to the other side of the pictures I put some print outs I found on the blog Sugar and Soirees. You should check them out as the pictures don't do justice to how beautifully detailed they are. I happened to have the candelabras from a party I hosted before and then I just added some fake spiderweb to dirty them up. I like how in the dark the spiderweb looks almost like a fog, something hard to capture in pictures.


I have another cut out in between my kitchen and my living room. I bought a bunch of odds and ends at some picker stores that were covered in dirt, which was a plus :) I decided that this ledge was more of a witches theme and added the Double, Double Toil and Trouble print out from Ella Claire Inspired to a frame.


As you can see this ledge was a work in progress. I added creepy cloth to break up the open space between the rooms and then put some fake spiders in the net. I put darker flowers and branches I bought at Michael's in the vase and the wine bottle. Lastly I put spiderweb up on everything trying again to give it the look of fog, which I especially like coming off of the small cauldrons.


I really wanted there to be a strong tie in to the Haunted Mansion so I printed off the transcript and picked some of the seance phrases to write up and put up on the walls. Of course I couldn't leave out the Grim Grinning Ghosts line from the song!


This seance table is my favorite. I found the lamp at a thrift store for $10 and put creepy cloth over it. Next I framed a nicely done art piece of Madame Leota (check pinterest as I lost the original link) and an 8x10 of the "When Hinges Creak" line. I also wanted to honor the Haunted Mansion library by having a few Spell Books and luckily I found a fun printable from The Idea Room


Sunday, September 27, 2015

Creepy Portrait Wall

This year I decided to go all out on the interior of my house for Halloween. I saw an idea on Pinterest for a creepy type of photo wall and wanted to try it out. It was really easy to recreate and you can put a lot of your own touches on it.


All you need are picture frames, even ones you already own, and the time and energy to search out Pinterest or the internet for photos that fit your theme. In my case, half the frames I owned and the other half I got at thrift stores. I probably spent $5.00 total for frames. I used push pins to hang all the frames as they were lightweight. 


As you can see above, and throughout the other pictures, I'm really into witches this year. I liked this picture above and the fact that it printed with a black boarder. I decided to use a dark red scrapbook paper for the background and put it in a larger black frame. It helped give the overall look of the wall a "darker" feel.


Above are some of the frames I used and a closeup of some of the pictures. Check out those twins! They get me every single time I see them! Just loving sisters right? Or something out of The Shining!?


The above picture is my absolute favorite! As many of you may recall, my love of Halloween comes mostly from my Gran Mac. Unfortunately she passed away this spring and so the witches are a tribute to her. She absolutely loved the Wizard of Oz and the Wicked Witch of the West was her favorite character. The photo itself just seemed like something she would really love.

The cool thing about this frame is that I bought it as-is with no glass so it was really lightweight. I just loved all the different layers and colors of the frame. It was perfect for putting a green background to compliment the black and white photo.


Above is the finished project. I will note that the painting of the girl in white to the left was a $10 picker find that seemed so fitting I just had to have it! You will also see that I put a few "scenic" pictures in there for effect, including the outside of the WDW Haunted Mansion on opening day. And if you look really close you might see a few Grim Grinning Ghosts! It's a little hard to take a quality picture of the overall look, but trust me when I say it's amazing in person.

Next up I will get more into the detailed touches of what makes this a WDW Haunted Mansion theme. All I'll say is be prepared for a whole lot of Leota! Stay tuned to see what's in store....

Sunday, September 20, 2015

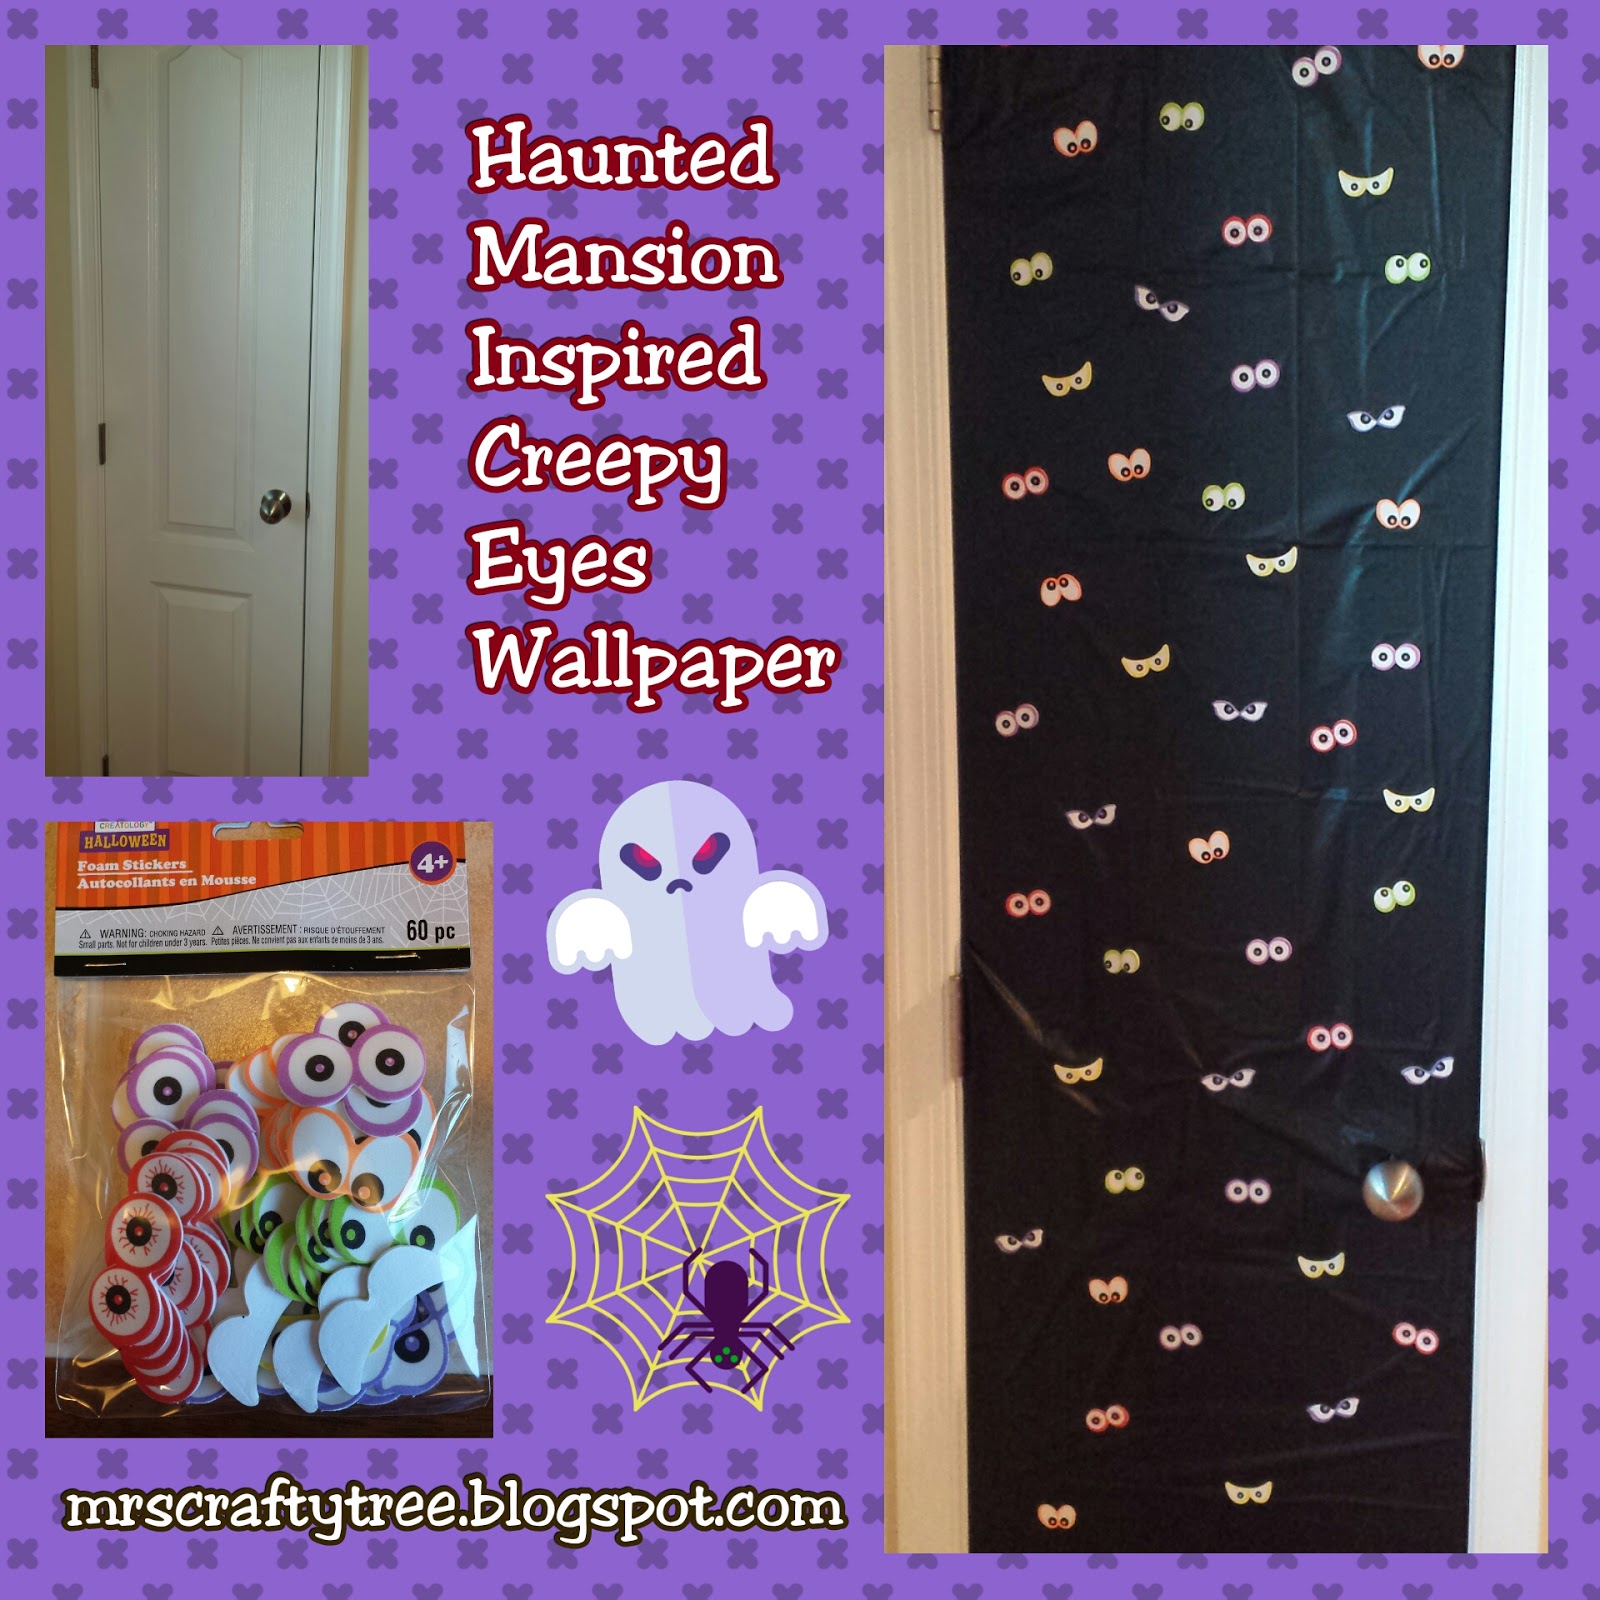
Creepy Eyes Wallpaper


After a very long time away from blogging, I'm back, and just in time for Halloween!! I've been crafting during the hiatus, I just haven't been sharing it on the blog as we've been a very busy family this year.

I'm not surprised that I had an urge to blog again right around the time I started thinking up ideas for Halloween. As I've mentioned before it is my absolute favorite holiday!

This year the inspiration for my interior decorations is coming from the Walt Disney World Haunted Mansion ride. I have a LOT to share with you over the next few blog posts, but I figured I'd kick it off with a simple and very cost effective craft I call "creepy eyes wallpaper".

Note: I did this by myself within 15 minutes but it is a very kid friendly craft if you have little helpers!


For those looking to recreate this craft you'll be happy to know it cost me a total of $4.50. I got the black tablecloth for $1.50 at Dollar General and the creepy eyes for $2.99 at Michael's. Other supplies you will need include scissors, tape, and a stapler, but you should already have that on hand.


After taking the tablecloth out of it's packaging I hung it on the door and found a crease to cut it from to size it right. Make sure you have extra tablecloth on the sides and the top so you can wrap it around the door frame. The only part you'll want to be cut accurately is the bottom as you won't be wrapping that under. As you'll see in the picture above, I had enough excess tablecloth that i could roll it and staple it on the top corner. This will help keep the tablecloth from sagging. You want it as tight to the door as possible.

You'll also want to make sure you pull it tight around the hinges so that you are able to open and close the door without the tablecloth ripping. For the doorknobs, cut a small hole in the tablecloth and push the doorknob through. Don't forget to also cut a hole for the door jam as well so the door will function properly.

After you are finished taping the tablecloth to the back of the door you can begin to apply your sticker eyes. I found the pack I bought at Michael's had a nice adhesive so I'm not worried at all that the stickers will fall off. On the other hand I was able to gently peel them off and move them if I needed to, although I don't recommend doing that too many times.


Above is the finished product! I hope you like what I created.

I think it's important to point out that the reason I call this a "creepy eyes wallpaper" is because you could easily do this on any wall of your home. I chose to do it on this pantry door because the area I am decorating is my kitchen and I was running out of wall space.... which means next up is a wall of creepy photos you won't want to miss!


Wednesday, November 12, 2014

Creepy Science Lab - Halloween Party

I know Halloween is over, but i just HAD to share this blog with you even if it is late. I did promise you in my last blog post about the DIY Fake Blood - Tablecloth Decoration that I would follow up with other Halloween decor I was working on. The friend who offered their home up for the Halloween party really wanted to have a Creepy Science Lab theme.

The first part of this blog I will talk about some of the DIY stuff I put together to match her theme. The second part of the blog will show how the overall theme turned out when everything was put in place. (Please note that the lab stuff was borrowed and so i can only share with you the cost of things I helped to make.)


This first one was really easy and cheap. You will need mason jars, yellow food coloring, and rubber bats, rodents, spiders or whatever other creepy realistic rodents/pests you can find. Rubber rodents are $1 a piece, Mason jars $1 to $2, food coloring is around $3 and so it should cost about $10 to make 3 "mad scientist jars".

We left the rat alone in one jar. His beady red eyes looked awesome in the yellow water. The other jars we cut off the bats wings and put each wing and the body in separate jars. You just drop in around 10 drops of yellow food coloring and fill the jar with water.

Tip: A lot of sauces you buy at the store come in mason jars. Peel off the labels and reuse them for these kinds of projects.


Ripped up black curtains help set the mood for the room, which of course is always "dark and creepy" when it comes to Halloween. We took old curtains and shredded them using scissors. (If you don't have any black curtains lying around I suggest checking out your local thrift store.) In the above picture I'm showing you how to create realistic wear and tear on "50 years left behind" curtains. 

One method is to twist a piece of the curtain with your fingers, then cut a chunk of that off and that will make a jagged hole in the curtain. Another way is to get a pair of scissors (preferably dull blades) and instead of cutting straight, pull down tight on the curtain and rip up with scissors. This makes it so that your tears and cuts aren't all in a straight line.


We really scored when we found these mirrored wall candle holders at the thrift store. I believe we paid $1 a piece for these and $.20 a candle. We took black Plasti Dip ($10 a can) and sprayed that over it to get our desired look. The bonus on Plasti Dip is it peels off if you want your item to go back to the way it originally looked. We taped the mirrors before we sprayed them to get a clean look.

Well that about sums up the DIY projects I worked on for this party. I will point out things in the pictures below that we were able to find at a cheap price. Again the lab stuff is real and was on loan :)


Thrift store items: gold tray $1, candle holders $1 each, gray metal box $2, gray yarn $1 (and seriously what a cool "dust" effect that made)

Loved the use of the electronic tea candles. You can get a 12 pack of these on Amazon for around $10. Great thing is you can use them for many other events too.


There are some real brains and some fake brains in this picture above :)


Bought those pop up paper wall spiders you see above for $2 at Michaels. It was on clearance right before Halloween and was Martha Steward brand. The sconce was $2 at the thrift store.


Gold candle holder was $1 thrift store find. The light and cabinet above are covered in "creepy cloth" and bought at the Dollar Tree. Hard to tell from the picture but the purple light bulb was a cool effect in person.


Our guests even made "creepy" snacks and bought wines that had Halloween fitting names. It was a great night out and we had a lot of fun with this party.